

Best overall: a split-bottle military hydration system for easy checking and a separate reserve. Best for drinking on the move: a hydration bladder; best for a compact belt kit: a single bottle. This 2026 guide ranks example configurations by water capacity, then explains which suits your pack, refill plan and cleaning routine.
- Choose a split-bottle military hydration system when visible water levels and a separate reserve matter most.
- Choose a hydration bladder for drinking on the move, but check filled dimensions against your rucksack.
- Military Mart’s surplus buying rule applies here: check condition, included parts and suitability before choosing kit.
- Capacity is not a drinking target; plan water around your route, conditions and reliable refill points.
Why does hydration capacity matter?
A bigger reservoir gives you more carrying capacity. It also adds weight and takes space from clothing, shelter and food. Approximately 1 litre of fresh water weighs 1 kilogram, before you count the container.
For a 2026 kit refresh, start with the route rather than the biggest number on a listing. Separate the water you need while moving from water for cooking, and confirm where you can refill safely. A stream marked on a map is not proof of a usable drinking-water supply.
Military Mart is an army surplus specialist for buyers who want genuine kit with clearly stated condition. The same practical approach applies to water carriers: inspect what touches your drinking water, not just the camouflage cover. Use the guide to identifying genuine military surplus when authenticity matters.
What makes the best military hydration system?
- Usable capacity: compare the reservoir’s water volume, not the storage capacity of its outer pack.
- Filled fit: check the container when full, with the rest of your kit packed around it.
- Drinking access: choose between a hose you can reach while walking and a bottle you remove to drink.
- Cleaning access: inspect the opening, hose and valve; all need cleaning and complete drying.
- Condition and completeness: establish whether the listing includes a reservoir, carrier, hose, valve and closures.
- Separate reserve: decide whether one leaking container would leave you without drinking water.
An outer carrier is not a complete hydration system. A canteen pouch holds a container; it does not establish that a bottle is included. Likewise, a rucksack’s hydration sleeve does not tell you which reservoir will fit.
Military hydration systems at a glance, ranked by capacity
These are example configurations to compare, not specifications for named products. The table runs from highest to lowest capacity; the recommendation depends on how you use the kit, not capacity alone.
| Rank | Configuration | Water capacity | Best for | Standout feature | Key limitation |
|---|---|---|---|---|---|
| 1 | Large bladder configuration | 3 litres | Carrying more water with hose access | Single reservoir for on-the-move drinking | All carried water depends on one reservoir |
| 2 | Compact bladder configuration | 2 litres | Fitting hose-fed hydration around other kit | Less filled volume than the larger configuration | Remaining water is harder to inspect inside a pack |
| 3 | Split-bottle configuration | 2 litres: two 1-litre bottles | Keeping a separate reserve | Containers can be checked and used independently | Requires space for both bottles |
| 4 | Single-bottle configuration | 1 litre | Compact belt or day kit | Simple access and visible inspection | Less capacity between refills |
A full 3-litre reservoir carries approximately 3 kilograms of water. A 2-litre configuration carries approximately 2 kilograms. Those figures exclude the reservoir, bottles, carrier and fittings; compare the complete packed load before deciding.
1. Large bladder: best for higher-capacity hose-fed carry
A 3-litre bladder configuration puts your water in a flexible reservoir with a drinking hose. It suits a buyer who wants more capacity than the smaller examples here without removing a bottle whenever they drink. Check the actual model’s filled dimensions before pairing it with a bergen.
The useful feature is access, not a promise that the water will last for a particular distance. Weather, exertion, individual needs and refill opportunities determine your plan. Do not treat 3 litres as an automatic full-day allowance.
Large bladder pros:
- Hose access lets you drink without taking out a bottle.
- One reservoir keeps the main water supply together.
- The larger example capacity leaves more room for water than the smaller configurations.
Large bladder cons:
- A reservoir leak threatens the whole supply carried inside it.
- The full container needs substantial room and adds water weight.
- Cleaning includes the reservoir, hose and drinking valve.
Best for: buyers who need the higher carrying capacity and have checked their rucksack fit.
Verdict: Buy for capacity and hose access; skip if the filled reservoir compromises pack fit.
2. Compact bladder: best for hose access in a tighter pack
A 2-litre bladder configuration offers the same basic drinking arrangement with less water volume than the larger example. Choose it when your route plan supports that capacity and your pack needs room for other kit. Smaller capacity is not permission to rely on an uncertain refill.
Check how you will refill it. A reservoir buried beneath tightly packed gear creates a different job from a bottle in an accessible pouch. For your 2026 setup, practise removing and replacing the full reservoir before taking it out on a longer walk.
Compact bladder pros:
- Hose-fed drinking keeps the container inside the pack.
- Less water volume needs less space than the larger example.
- A suitable dedicated sleeve keeps the reservoir separate from loose kit.
Compact bladder cons:
- Lower capacity means less water carried between refills.
- You cannot readily see the remaining water while it is packed away.
- Hose routing and connector compatibility still need checking.
Best for: walkers who want on-the-move access and have a confirmed refill plan.
Verdict: Buy when the route and filled fit support it; skip when you need greater carrying capacity.
3. Split bottles: best for checking water and keeping a reserve
Two 1-litre bottles give you 2 litres in separate containers. You can use one first and keep the other closed as a reserve, or distribute them between suitable pack pockets. Keeping containers separate avoids relying on one reservoir seam or closure.
This is the default recommendation for someone undecided between bottles and a bladder. Inspection is straightforward: remove each bottle, check the closure and look at the remaining water. You still need to confirm that the bottles and their previous use make them suitable for drinking water.
Split-bottle pros:
- You can inspect each container independently.
- A separate bottle preserves some supply if the other leaks.
- Bottles can be removed individually for refilling or camp use.
Split-bottle cons:
- Both containers need secure, accessible carrying positions.
- Drinking normally means removing a bottle rather than using a hose.
- Different bottles and closures complicate replacement-part matching.
Best for: bushcraft users who value simple inspection and separate water storage.
Verdict: Buy as the default configuration if you prefer bottles and have suitable carrying space.
4. Single bottle: best for compact belt kit
A single 1-litre bottle keeps the arrangement simple. Pair a drinking-water-suitable bottle with a correctly fitting pouch, and check that you can remove it without taking off the whole belt. A loose bottle or awkward closure defeats the point of accessible kit.
This configuration ranks last by capacity, not by usefulness. It fits a role where your water plan supports it, including access to a separate main supply. It is not the default choice for a remote outing with uncertain refills.
Single-bottle pros:
- One container is straightforward to inspect and clean.
- A suitable pouch keeps drinking water within reach.
- The arrangement avoids hoses and bite valves.
Single-bottle cons:
- The smallest example capacity gives the least carried water.
- Losing or damaging the bottle removes that entire supply.
- Pouch fit does not prove that a bottle is drinking-water suitable.
Best for: compact kit used with a confirmed water plan or separate reserve.
Verdict: Buy for a defined compact-carry role; skip as an unplanned substitute for adequate water.
How should you match capacity to your trip?
Separate carrying capacity, starting fill and water requirement. A larger reservoir does not need to be filled completely on every outing, but an oversized container still has to fit. Your required water also includes cooking if you plan to prepare meals away from a safe supply.
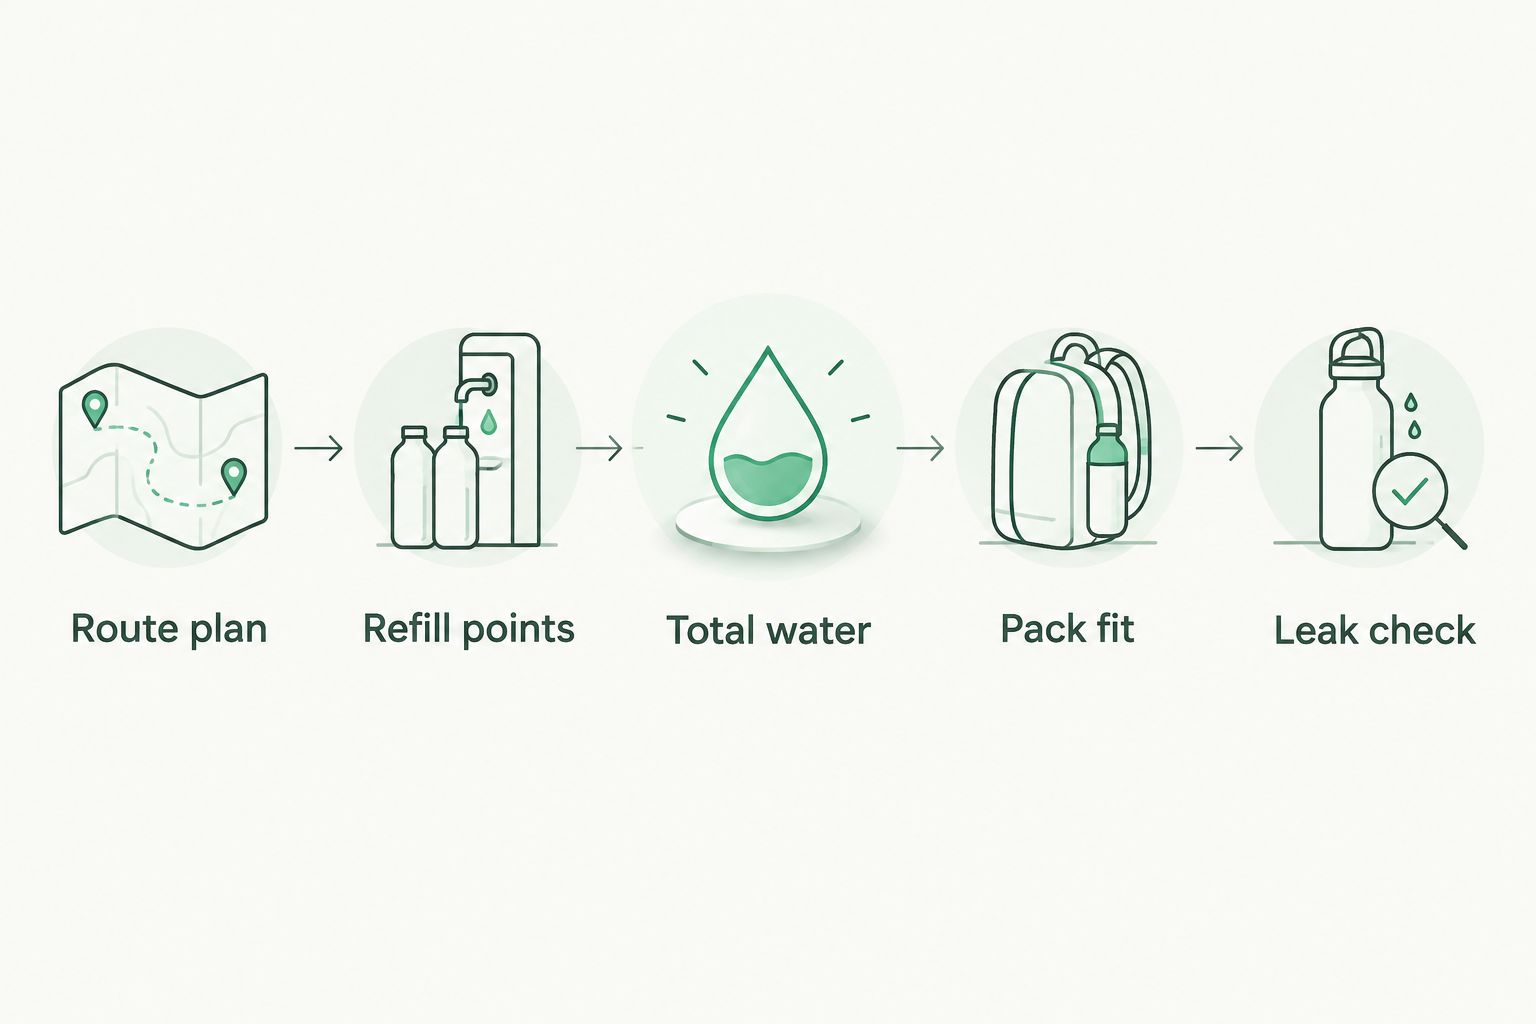
Use this sequence when planning a 2026 outing:
- Route plan: identify distance, terrain, conditions and places where you can stop.
- Refill points: confirm which supplies are dependable and suitable for drinking, or require treatment.
- Total water: account for drinking, cooking and a reserve appropriate to the outing.
- Pack fit: check the chosen containers full, alongside your actual kit.
- Leak check: test closures, connections and drinking access before departure.
Do not use a fixed litres-per-hour rule as a substitute for planning. Needs differ with conditions and exertion. For cadet activities, follow the activity organiser’s water instructions rather than choosing capacity from a general buying guide.
What should you check on surplus hydration kit?
Condition comes before provenance when a container touches drinking water. Genuine issue kit still needs a clear description, suitable materials, an acceptable history and working closures. A used outer pouch and a used drinking reservoir deserve different inspection.
Military Mart’s honest-grading approach is relevant to military hydration system buying: read the individual description rather than treating a grade as a universal specification. Do not transfer the stated condition of a carrier to a reservoir that is separate or absent.
Check these areas before use:
- Reservoir body: inspect seams, corners and areas that have folded during storage.
- Closures: look for damage to threads, caps, seals and sliding closures.
- Hose and valve: check for contamination, damage and leaking connections.
- Previous contents: reject containers with unknown or unsuitable histories for drinking-water use.
- Cleaning instructions: confirm the maker’s method and whether every internal part can dry properly.
A clean-looking exterior does not establish a clean interior. Nor does a military label establish current drinking-water suitability. Keep fuel containers out of the shortlist: fuel approval is not drinking-water approval.
How do you check bladder and rucksack compatibility?
Measure the available space and compare it with the reservoir’s filled dimensions. Check the opening as well as the internal sleeve; a container that fits inside still needs to pass through the access point. Inspect suspension points and the intended hose exit without assuming that every bergen has the same arrangement.
Pack soft kit around the reservoir without crushing fittings or trapping the hose under straps. Keep sharp equipment away from the reservoir. Then put the loaded pack on and check that the valve remains reachable when the shoulder straps are adjusted properly.
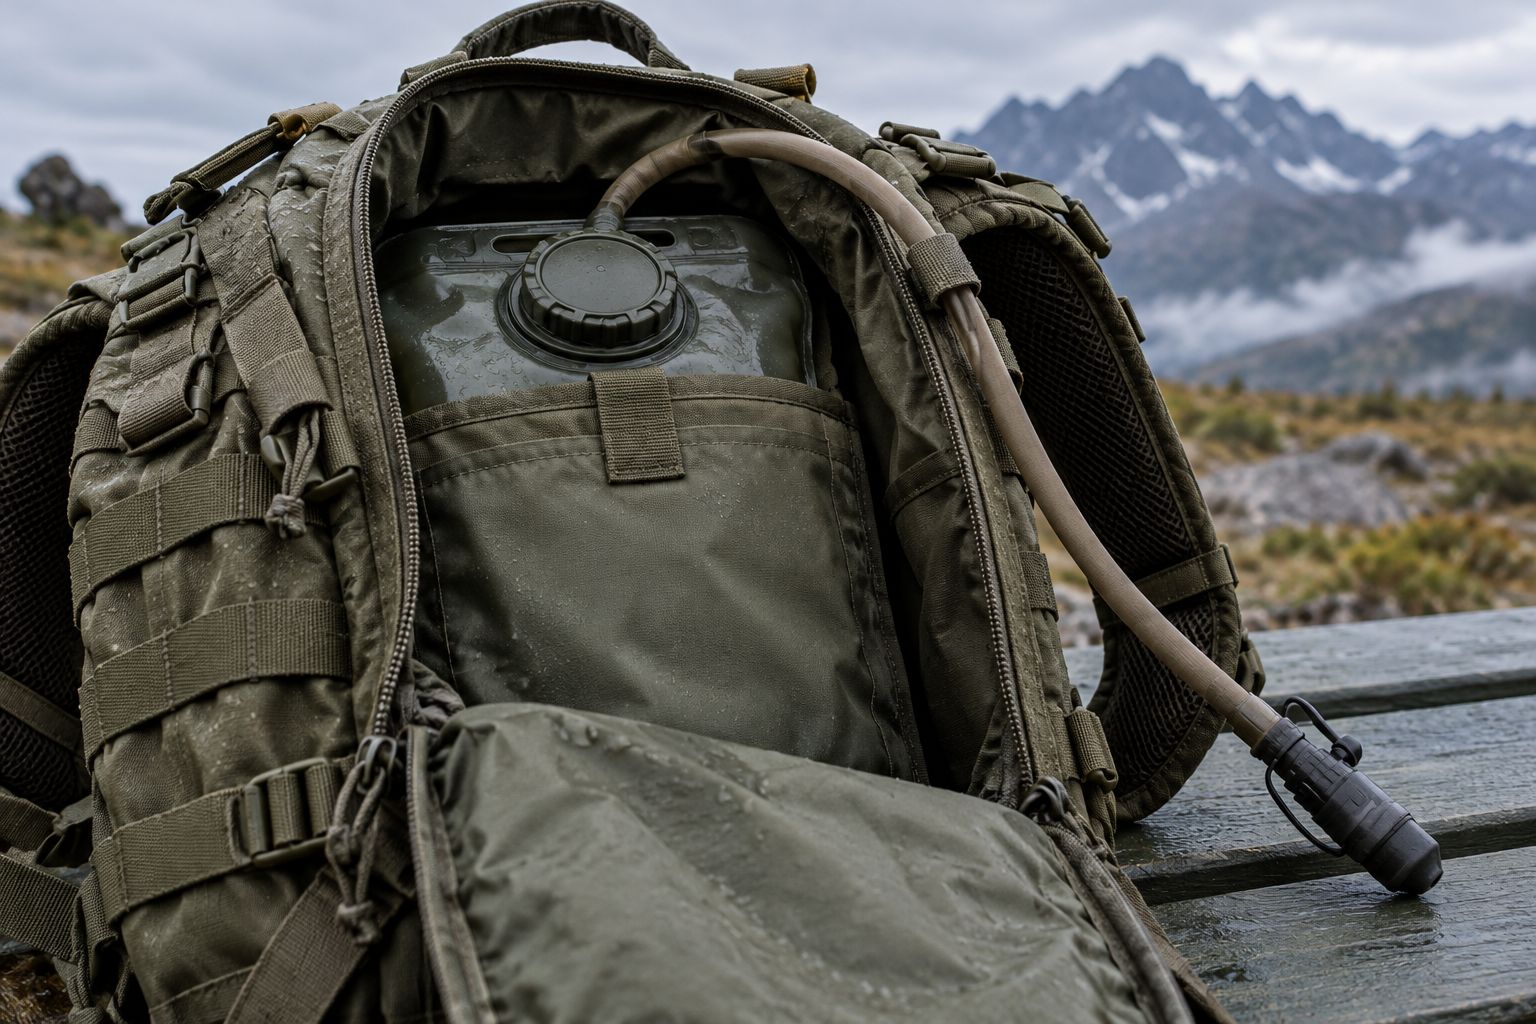
For a 2026 pack check, test the kit you will actually carry rather than an empty rucksack. Follow the practical guide to connecting a hydration bladder to a bergen before committing to the arrangement.
How are these configurations ranked?
Capacity determines the table order. Drinking access, filled fit, cleaning, condition and a separate reserve determine the use-case verdicts. This is a comparison of configurations, not a claim that named products have passed a field test.
The split-bottle arrangement earns the default recommendation because its containers can be inspected separately and one can remain a reserve. A bladder wins a different job: convenient hose access while moving. Neither arrangement removes the need for safe water and a route-specific plan.
Which military hydration system should you choose?
Choose split bottles if you want simple inspection and a separate reserve; choose a bladder if drinking on the move is your priority. Decide the required capacity first, then check that the filled containers work with your pack or webbing.
Do not buy a larger system just because it ranks first by litres. For your 2026 setup, secure fit, clean drinking components and dependable refill planning matter more than camouflage or an issue label.
FAQ
What’s the best military hydration system for bushcraft?
A split-bottle configuration is the default choice here for bushcraft users who want easy inspection and a separate reserve. Choose the total capacity around your route, cooking needs and reliable refill points.
Is a hydration bladder better than a military water bottle?
A hydration bladder is better for hose-fed drinking on the move; a bottle is simpler to remove and inspect. Choose according to access, cleaning and how the filled container fits your kit.
Should I choose a 2-litre or 3-litre hydration bladder?
Choose the capacity your water plan requires and your loaded pack can accommodate. A 3-litre fill carries approximately 3 kilograms of water, compared with approximately 2 kilograms for a 2-litre fill, excluding the container.
Does a military hydration carrier include the bladder?
A carrier does not establish that a bladder is included. Check the individual listing for the reservoir, hose, valve and closures before treating it as a complete system.
Can I drink from a used military hydration bladder?
Use a used bladder only when its suitability, condition and history are acceptable and it can be cleaned according to the maker’s instructions. Reject damaged or contaminated drinking components rather than relying on the outer carrier’s condition grade.
Can I put a hydration bladder in any bergen?
No, a bladder is not automatically compatible with every bergen. Compare filled dimensions, sleeve access, suspension points and hose routing, then test the loaded pack.
Can a military fuel jerry can hold drinking water?
Do not treat a fuel jerry can as a drinking-water container. Use a container explicitly suitable for potable water, with a known history and appropriate cleaning instructions.
One last thing
Test access as well as leaks. Put the full pack on, fasten the straps and try to drink, check your remaining water and reach the reserve. Finding an inaccessible bottle at home is a packing problem; finding it on the hill interrupts your water plan.


Leave a comment