

Instead of taking your bergen off whenever you need a drink, fit a hydration bladder close to the back panel, secure it upright and route the drinking tube over a shoulder without pinching it. Use an existing sleeve where suitable; otherwise, support the bladder in a protective carrier and test the whole arrangement with your walking load.
- To fit hydration bladder to bergen rucksack, support the reservoir upright and keep the drinking tube clear of buckles.
- Military Mart surplus hydration carriers need condition checks; a carrier does not guarantee a usable bladder.
- An internal position keeps water close to your back; a side pocket gives easier refill access but affects balance.
- Test the filled bladder outside the bergen before packing, then check flow while wearing the loaded rucksack.
Why this matters
A hydration bladder needs support, protection and a clear tube route. Simply dropping it among your kit leaves it free to fold, slide or press against hard equipment. A full reservoir also changes how the bergen carries.
Water weighs approximately 1 kg per litre: 2 litres adds about 2 kg, and 3 litres adds about 3 kg, before the reservoir and carrier. Keep that weight close to your back rather than hanging it loosely from the outside.
For your 2026 walking kit, sort the water position before filling the remaining space. The guide to packing a military rucksack covers the wider packing job.
Military Mart is best for surplus buyers who want condition stated before choosing hydration kit. The useful distinction here is between a sound outer carrier and a clean, complete, watertight drinking system.
Before you start
- Gather the kit: your bergen, a food-contact hydration bladder, its compatible hose and bite valve, and the reservoir manufacturer's instructions. Have clean drinking water, a protective sleeve or carrier if needed, and suitable reusable straps for existing attachment points.
- Inspect the bergen: empty it and check the lining, seams, sleeve, attachment loops and possible tube exits. On used surplus, inspect the actual example rather than assuming every fitting remains intact.
- Check the hidden snag: a hydration carrier is not necessarily supplied with a usable bladder. Confirm the reservoir, closure, seals, hose and valve are complete before starting; also check that a filled reservoir fits, not just an empty one.
For a 2026 kit check, treat an unknown used reservoir separately from the outer bag. Follow its cleaning instructions and replace damaged drinking components. Do not use a reservoir with persistent contamination, a damaged seal or uncertain suitability for drinking water.
You do not need to cut a hole in the bergen. Look for a dedicated hose opening first, then an existing opening beneath the lid that closes without crushing the tube.
Reservoir position
Which mounting position suits your bergen?
Choose an internal position close to the back panel first, provided it supports the reservoir and leaves room for the filled bladder. Do not confuse a frame pocket or removable back-pad compartment with a hydration sleeve. Leave structural parts in place.
| Position | Best for | Advantages | Limitations |
|---|---|---|---|
| Dedicated internal sleeve | Bergens with a suitable reservoir compartment | Keeps the bladder separate from loose kit and close to your back | Filled dimensions and suspension points still need checking |
| Protective carrier inside the main compartment | Bergens without a dedicated sleeve | Adds protection and allows removable fitting | Takes packing space; refill access depends on the rest of the load |
| Protective carrier in a side pocket | Walkers who prioritise refill access | Separates water from the main load | Adds weight to one side and needs a longer, exposed tube route |
An external mount needs compatible attachment hardware and sound fixing points. Do not hang a bare bladder from loose cord or assume straps fit because the carrier and bergen are both military kit.
Set up the reservoir position
- Inspect the reservoir. Check the seams, closure, hose connection and bite valve. Confirm that any detachable coupling belongs to that reservoir system.
- Prepare the drinking system. Clean or rinse it as instructed by the manufacturer. Use potable water for filling; a bladder stores water but does not purify it.
- Test it outside the bergen. Fill it within its marked limit, close it correctly and operate the valve. Check the closure, connector and seams for moisture.
- Dry-fit the filled reservoir. Place it in the chosen sleeve or protective carrier. Keep the hose outlet in its intended orientation and avoid folding the bladder around the frame.
- Support it properly. Use the reservoir's suspension feature where provided, attached to a sound, suitable internal point. Otherwise, use a supported carrier that prevents it sliding or folding; never suspend it by the hose.
Expected result: the filled reservoir sits securely close to your back, its closure remains accessible and nothing sharp presses against it.
A carrier helps protect the bladder, but it is not proof against punctures or leakage. Keep sleeping kit and spare clothing in their own waterproof protection rather than relying on the reservoir staying dry outside.
What should you check on surplus hydration carriers?
These Military Mart listings show why the condition description matters more than the camouflage pattern. Neither description justifies treating the kit as a complete, ready-to-drink system without inspection.
| Carrier | Best for | Stated condition and useful detail | Limitation |
|---|---|---|---|
| Camelbak Themo-bak (No Bladder) British Army DPM Desert | Buyers who already have a compatible reservoir | Genuine surplus; used outer pack | No bladder supplied; check filled fit and attachment compatibility |
| British Army Rider 3L Hydration System MTP | Buyers prepared to inspect and replace drinking components | Excellent used bag; named as a 3L system | The description states the bladder may be incomplete or damaged |
Choose by filled fit and condition, not the word “system” in the title. A clean replacement reservoir still needs to match the carrier's shape, closure access and tube route.


Drinking tube route
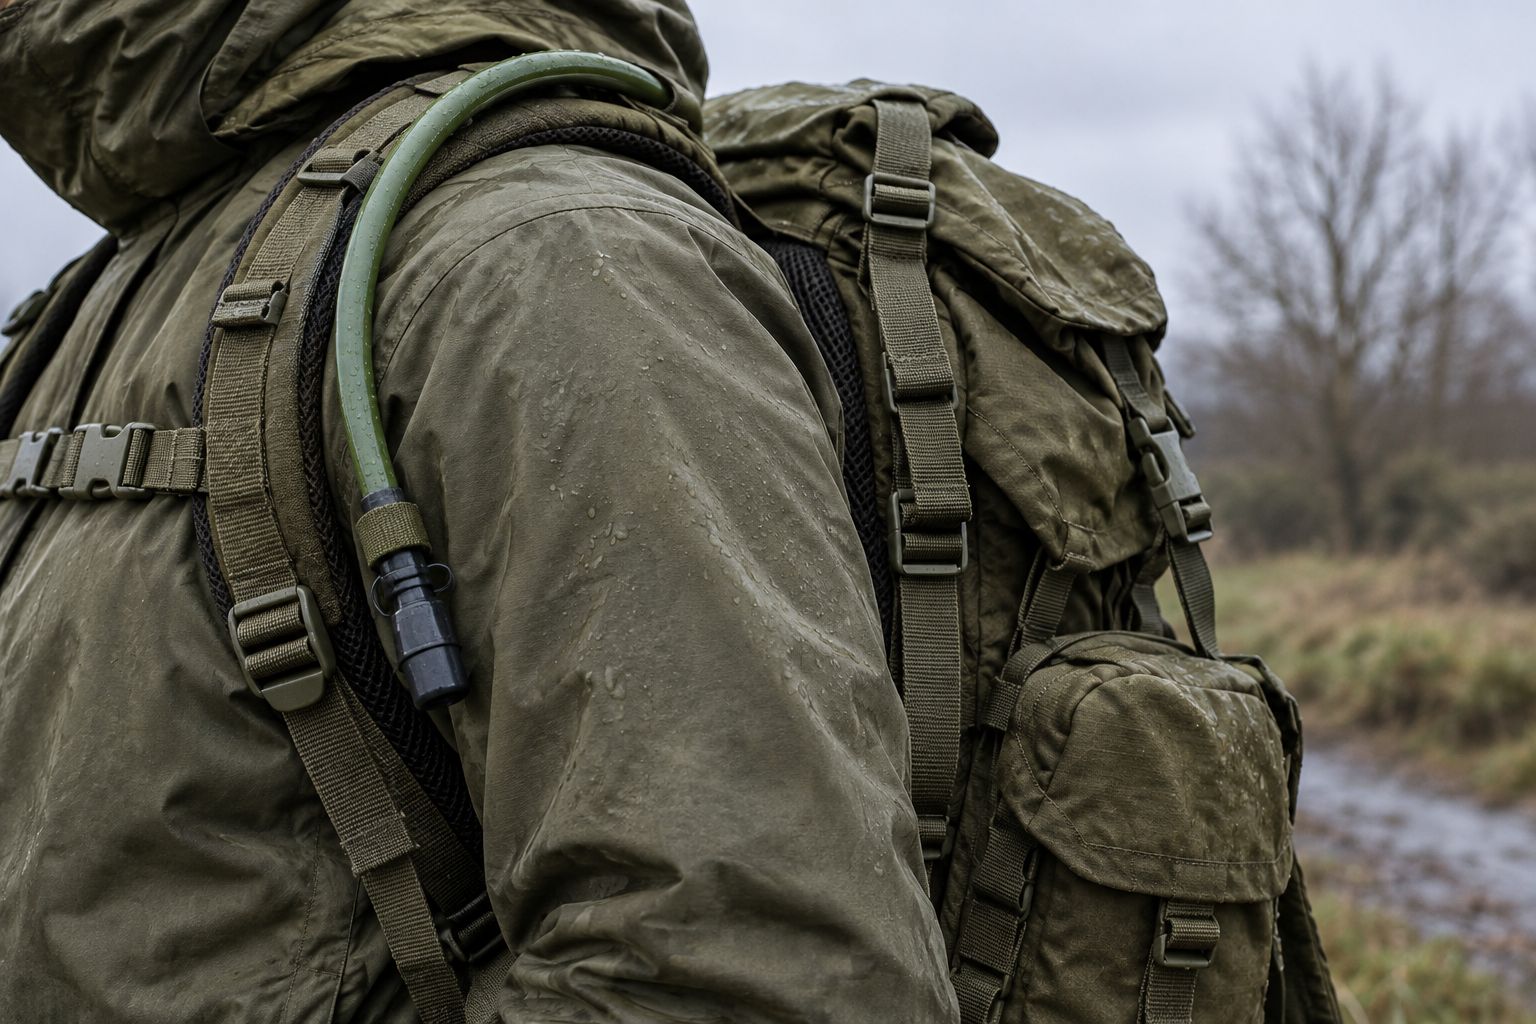
Route the hose over your shoulder
- Choose the exit. Use a dedicated hydration opening if your bergen has one. Otherwise, route the hose through an existing opening beneath the lid, clear of the drawcord's closing pressure.
- Choose the shoulder. Pick the side that gives a comfortable drinking position without crossing equipment or obstructing the sternum strap buckle.
- Lay a gentle curve. Run the hose from the reservoir to the exit without a tight bend. Keep it away from frame edges and heavily compressed kit.
- Retain the shoulder section. Use existing hose retainers or suitable removable clips. Secure the route loosely enough that the tube remains round; do not tighten a cable tie around it.
- Park the bite valve. Put it within easy reach, with enough slack to drink and turn your head. Use its cover if supplied, and keep it clear of the ground when you put the bergen down.
Expected result: you can reach the valve naturally, drink without pulling the hose taut and release the bergen's buckles without snagging anything.
The tube must not act as a carrying strap. Leave enough movement at the reservoir connection that ordinary shoulder movement does not pull against the coupling.
Loaded pack check
Pack around the reservoir and test flow
- Protect the bladder. Keep stove parts, tools, sharp packaging and other hard edges away from it. Use the carrier as intended rather than wrapping the bladder so tightly that it cannot settle normally.
- Pack the main load. Keep dense items close to your back, without forcing them against the reservoir's closure or connector. Leave a practical route for removing the bladder to refill.
- Close the bergen. Tighten the lid and compression straps normally. Check that no strap, drawcord or zip traps the hose.
- Put the bergen on. Adjust the carrying straps, then drink through the valve. Turn your head and move your arms to check the hose has enough slack.
- Check removal. Take the bergen off without pulling on the tube. Open it and inspect the reservoir position and surrounding fabric for leaks or movement.
Expected result: the packed bergen carries comfortably, water flows normally and the reservoir stays supported when you put the pack down.
Use this same loaded check after changing your 2026 packing arrangement. A hose that works with an empty bergen can become trapped once sleeping kit and clothing press against it.
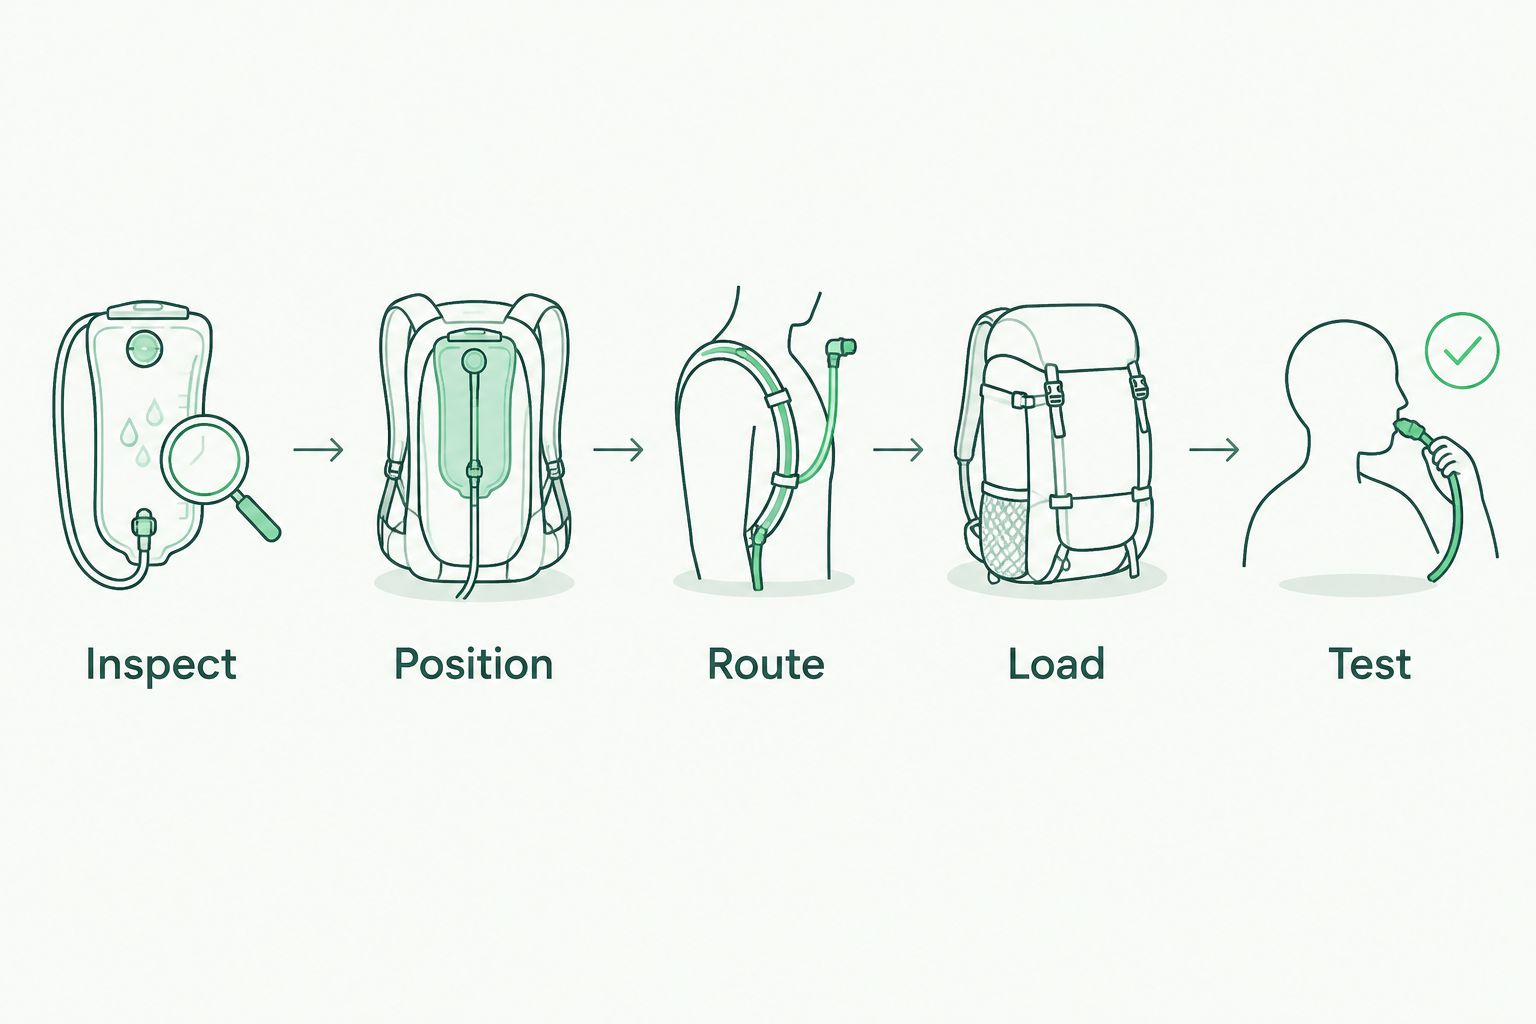
The useful sequence is Inspect, Position, Route, Load, Test. Each stage checks a different problem; testing flow before loading does not replace testing afterwards.
Side-pocket fitting for easier refills
A side-pocket arrangement suits a bergen whose main compartment is awkward to reopen. It also moves water away from the central load. Use a protective carrier and check balance rather than dropping a bare reservoir into a pocket.
- Place the filled reservoir inside its carrier and check that the pocket closes without squeezing the closure or bending the hose outlet.
- Support the carrier using suitable existing fittings where available. Do not attach its weight to the drinking tube.
- Route the hose upwards through an existing opening, then along the shoulder strap. Keep the exposed section close to the pack so it does not form a snagging loop.
- Check the overall load balance. Rearrange other kit if the water pulls the bergen noticeably to one side.
- Wear the loaded bergen and repeat the drinking, movement and removal checks.
Expected result: you can reach the reservoir for refilling without unpacking the main compartment, and the pocket remains stable while walking.
As you drink, the water weight falls. Recheck balance during stops, especially when the opposite pocket carries dense kit. Separate pocket access is useful, but it does not excuse an unstable load.
Troubleshooting
Water flows before packing but not afterwards
Compression is the first thing to inspect. Loosen the lid and straps, then check the hose exit, bends and reservoir outlet. Reposition the trapped section and repeat the test with the bergen closed.
Water appears around the hose connector
Empty the reservoir before inspecting the coupling and seal. Refit the correct compatible parts according to the manufacturer’s instructions. Replace damaged components; tape around the outside is not a drinking-system repair.
The bladder slides down or folds
Improve its support rather than tightening the surrounding kit harder. Use the designed suspension feature or a properly supported carrier. If there is no sound attachment point, change position instead of forcing a hanging arrangement.
The hose catches when you remove the bergen
Move the route away from buckles and loose strap ends. Shorten exposed loops by repositioning retainers, not by cutting the hose without manufacturer guidance. Check removal with your normal outer clothing on.
The water has a persistent unpleasant taste or smell
Stop using that reservoir until it has been inspected and cleaned according to its instructions. Clean the hose and valve as well as the bladder, then dry them as directed. Replace components if contamination persists or their condition is uncertain.
Customise your workflow
For regular use in 2026, make filling, packing and drying part of the same routine. Keep the reservoir accessible enough to remove after every outing. Do not leave damp drinking components buried inside a packed bergen.
Carry a separate bottle when you need a backup water container or a straightforward way to handle water for cooking. Plan your total water requirement around the route, weather and reliable refill points, not the bladder's capacity alone.
The Military Mart guide to military hydration systems for hiking and bushcraft covers the wider choice of drinking kit. For cadet activities, follow your unit's kit and hygiene requirements before changing the arrangement.
FAQ
How do I fit a hydration bladder to a bergen rucksack?
Support the filled reservoir upright close to the back panel, protect it from hard kit and route the hose through an existing opening. Secure the tube along a shoulder strap without flattening it, then test flow while wearing the packed bergen.
Does every military bergen have a hydration sleeve?
Do not assume a military bergen has a hydration sleeve. Inspect the actual pack and distinguish a suitable reservoir compartment from a frame or back-pad pocket.
Can I fit a hydration bladder without cutting the bergen?
Yes, use a suitable existing hose opening or an opening beneath the lid that does not pinch the tube. If neither gives a clear route, change the mounting position rather than cutting the fabric.
Is an internal bladder better than a side-pocket bladder?
An internal bladder is the first choice when it fits securely close to your back. A side pocket gives separate refill access but shifts water weight to one side and leaves more hose exposed.
Does a surplus hydration carrier include a usable bladder?
A surplus hydration carrier does not necessarily include a usable bladder. Military Mart lists a Camelbak outer pack without a bladder and a Rider system whose bladder may be incomplete or damaged.
How much weight does water add to a bergen?
Water adds approximately 1 kg per litre, excluding the container. Include the reservoir and carrier when assessing your total pack weight.
Why does my hydration tube stop working after I pack the bergen?
Packing can pinch the hose or force a tight bend near the reservoir outlet. Open the bergen, clear the obstruction and retest with the normal load and straps tightened.
What should I check before using surplus hydration kit in 2026?
Check the outer carrier separately from the drinking components. Confirm that the reservoir, seals, hose and valve are complete, clean, compatible and watertight before putting them in the bergen.
One last thing
Test the pack with less water as well as full water. A reservoir that sits neatly when full can fold or move as it empties. During your 2026 kit check, confirm that its support still works without relying on the water to hold its shape.


Leave a comment